The term Warehouse in this sense refers to the virtual arrangement of product orders into regional containers known as "Warehouses". You can setup your Warehouses for channeling how your money is collected. You can also generate individual CSV report for separate logistics providers.
- Warehouse coverage is unique, and drills down to the state level. You may only have one warehouse covering a particular state.
- If you then set a different warehouse to cover a particular state, then the first warehouse will release the coverage for the same.
- The purpose of the Default setting is to automatically cover any states which are not specifically covered by other warehouses.
- Note: There can only be one 'Default' warehouse. You can edit the default warehouse, but it cannot be removed from the system.
- If warehouse X covers USA California and then you set warehouse Y to cover USA whole country, then the warehouse X's coverage of USA California is not disturbed, whereas warehouse Y will display USA All States, along with the exception of California (uncovered).
- If warehouse X covers USA whole country and then you set warehouse Y to cover USA Texas, warehouse X's coverage of USA whole country will be changed. Warehouse X will automatically cover USA All States with the exception of Texas (uncovered). Texas is now covered by Warehouse Y.
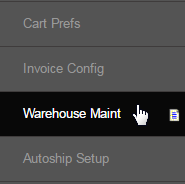
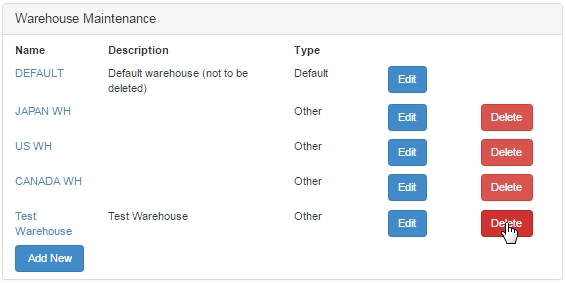
Go to Configuration > Shopping Cart > Warehouse Maint from the left hand menu or click on the same under Configuration on the home page.
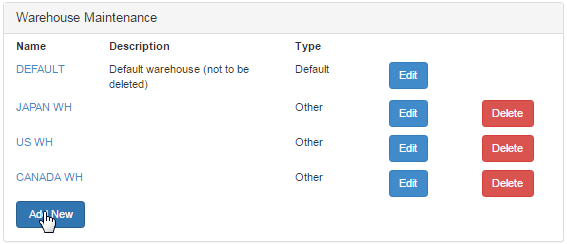
This will take you to the Warehouse Maintenance page, where the existing warehouses will be shown in the list. Click on the Add New button.
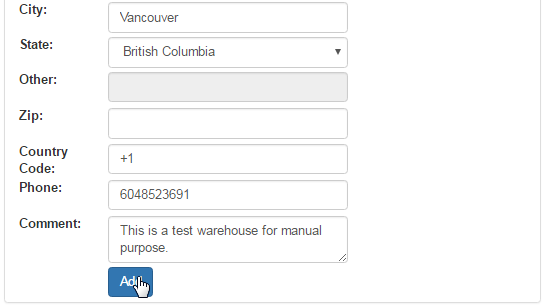
The Warehouse Edit page will be displayed. Fill in the details and then click on the Add button at the bottom. Here's a description of the fields.
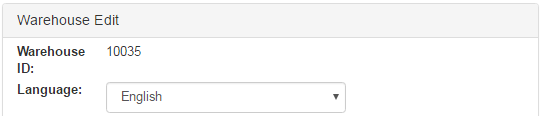
- Invoice FormatLanguage: Open the drop-down list to select the language in which the invoices for this warehouse should be formatted.
- Name: Enter the name of the warehouse, which will be the way to identify the warehouse in the system.
- Description: Enter a short description of the warehouse you are creating, which will be displayed next to the warehouse title.
- Warehouse Type: There can only be one Default warehouse. So select Others from the drop-down list. Setting a new warehouse to Default will change any existing default warehouse to the Other warehouse type. See "Warehouse Coverage" to learn more about the setup.
- Country: The country of the warehouse. This is an optional field. This is not part of the coverage settings.
- Address 1: The primary address of the warehouse. This is an optional field. This is not part of the coverage settings.
- Address 2: The secondary address of the warehouse. This is an optional field. This is not part of the coverage settings.
- Address 3: The additional address of the warehouse. This is an optional field. This is not part of the coverage settings.
- Address 4: The additional address of the warehouse. This is an optional field. This is not part of the coverage settings.
- Suburb: The suburb where the warehouse is located. This is an optional field. This is not part of the coverage settings.
- City: The city where the warehouse is located. This is an optional field. This is not part of the coverage settings.
- State: The state where the warehouse is located. This is an optional field. This is not part of the coverage settings.
- Other: Type in the state name if not listed in the State drop-list. This is an optional field. This is not part of the coverage settings.
- Zip: The postal code of the warehouse. This is an optional field. This is not part of the coverage settings.
- Country Code: The country code of the warehouse. This is an optional field. This is not part of the coverage settings.
- Phone: The contact number of the warehouse. This is an optional field. This is not part of the coverage settings.
- Comment: Type in a note for reference. This is a free text comment field. It is not currently used in the system and not required.

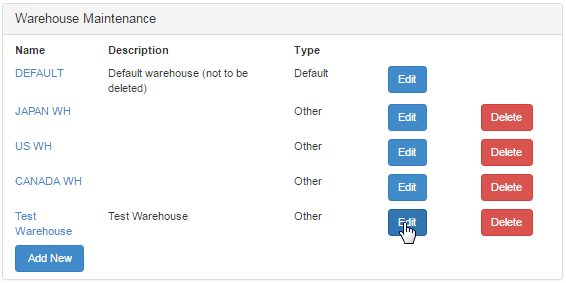
This will bring you back to the Warehouse Maintenance page. The new warehouse will appear at the bottom of the list where you can edit the same.
In Warehouse Maintenance, there are two ways to get to the Warehouse Edit screen - either click on the Edit button at the end of the row for the warehouse you wish to edit, or click on the underlined Name for the warehouse. Whichever option you prefer should display the editing screen.
In the Warehouse Edit, you can modify any of the warehouse details shown. Once you have changed or edited any field(s), click on the Update button below to save and apply the changes. Here's a description of the additional fields included in the update process;
- Warehouse ID: This is a unique warehouse identification number. This is simply the primary key identifier. Don't worry about this.
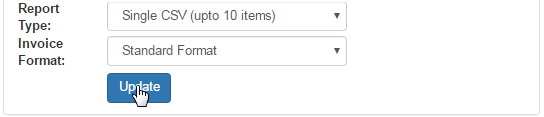
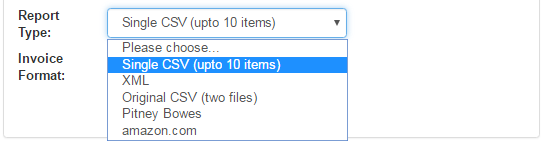
- Report Type: Controls the data stream out to a logistic provider by way of XML, CSV, etc. Select your preference from the drop-down list.
- Invoice Format: Select the type of format you want to present for your invoice of the company from the drop-down list.
For each order to be listed on the same CSV file, you must have the correct option selected. Selecting the single CSV (up to 10 items) option will allow you to generate a single report, which can contain up to 10 items on each order. If you are a multiple product company and orders are likely to exceed 10 line items, it is recommended that you use the scalable, Original CSV (two files) type which will create one file with member data and an order number, and another file for the line items of the order connected to the order number. This format is more common for larger logistics companies as well.
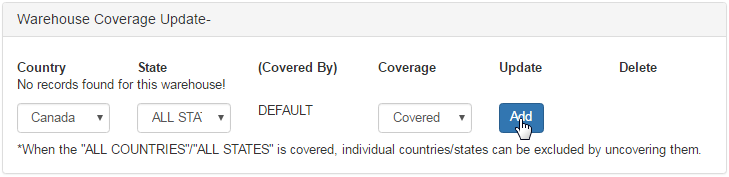
This is part of the Warehouse Edit screen, at the bottom. This determines which countries (or states within countries) are covered by the warehouse. Initially, you will see the message, No records found for this warehouse. Select the options from the drop-down list and then click on the Add button.
- Individual states may only have one warehouse covering them. However, a single warehouse may cover multiple states and/or countries.
- Existing coverages are shown here. Blanket coverage is normally shown first with some exceptions following down the list. Typically you would see:
- ALL COUNTRIES: This is the setting for all country coverage. The ALL COUNTRIES setting is only available to the Default warehouse.
- If the "Coverage" drop-down list is set to Covered, then this warehouse covers all countries.
- ALL COUNTRIES is the catch-all for all places not covered by warehouses. If warehouse X is covering ALL COUNTRIES, it does not remove the state and country coverage for other warehouses. It means warehouse X covers everything not specified by other warehouses.
- Note:Any places not showing a warehouse name in (Covered By) are currently being covered by the warehouse you are editing.
- Covered: The region shown in the list is covered by the warehouse you are currently editing.
- Uncovered: The region shown in the list is NOT covered by the warehouse you are currently editing.
In the Warehouse Maintenance area, simply click on the Delete button at the end of the row for the warehouse you wish to remove. A confirmation box will appear to confirm the deletion; click on the Ok button to proceed. Once deleted, the deletion confirmation screen/message should display.
- With new systems, the admin role of Senior Support has access to the Configuration > Shopping Cart > Warehouse Maintenance menu item. This means that all Admin user types of "Senior Support" or higher can access the Warehouse Maintenance by default.
- The role of Junior Admin has access to the Configuration Menu (which Warehouse Maintenance sits under; to see Warehouse Maintenance, you first need access to the Configuration Menu). You can change the access level for menu items in the Group Maintenance Configuration area.
- If changing the access level for these areas, remember that the Admin level you wish to restrict Warehouse Maintenance to must also be high enough to access the Configuration Menu (which Warehouse Maintenance sits under).
- The System > Charge/Invoice menu also requires "Senior Support" Admin level or higher by default. This may need to be considered when assigning users to administrate these areas, as it is usually desirable for anyone administrating Warehouses to have access to Charge/Invoice.