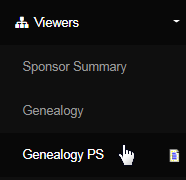
Click on Viewers on the left hand side to expand the menu structure and then click on the Genealogy PS sub-menu.
This would take you to the Personally Sponsored Genealogy page, where you can see the list of members whom the current distributor has personally sponsored. At the top of the page, the details of the upline members, including his sponsor will be displayed (based on how the system is configured).

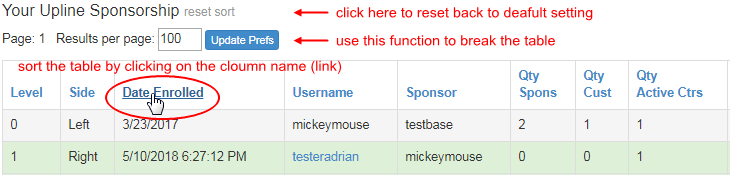
Below that, you will find the table containing the list of the members who have been personally sponsored by the member in question, with the following details. Unlike the Genealogy report, it displays only the Personally Sponsored members, although the attributes of the table are the same.
- Level: The level (in the downline tree) in which that member has been placed.
- Side: In which side/leg of the downline tree the member has been placed.
- Date Enrolled: The date on which the member signed up into the system.
- Username: The username of the distributor/member.
- Sponsor: The username of the member who has sponsored that member.
- QtySpons: The number of distributors sponsored by that member.
- Qty Cust: The number of customers sponsored by that member.
- Qty Active Ctrs: How many active centers the members has.
- Name: The complete name of the member.
- Status: The current status of the member, i.e. Active, Pending, etc.
- Best Rank: The best rank that the member has ever achieved.
- Volume: How much volume that member has.
- Autoship: How much volume is in their autoship setup.

You can sort the rows in the table alphabetically or numerically by clicking on the respective attribute link (column name). You can also break up the table to show the number of rows based on your choice. To break up the table, enter the value in the Results per page box and hit on the Update Prefs button.
The system also provides the member with the ability to send custom emails to other downline members. To do that, click on the Username (appearing as a link) of the member whom you want to send an email to. The first column will display the information about the member himself. Lets have a look;

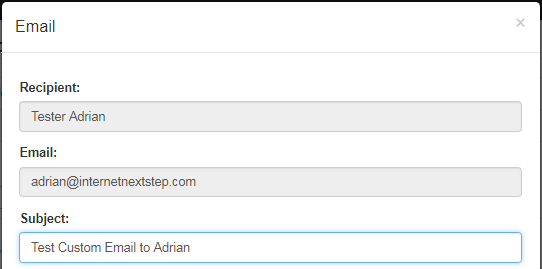
This will pop-up the Email window, where the following fields will be displayed. Fill in the content and then click on the Send button to proceed.
- Recipient | Email: Displays the name and the registered email address of the member to whom the email will be sent.
- Subject | Body: You need to type in the subject and the message of the email (to be sent) in the respective text areas.

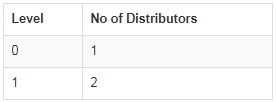
Then an Email sent successfully message will be displayed on the screen. If you do not wish to send the email, click on the Close button below. At the bottom of the page is another table displaying the number of distributors personally sponsored at each level in the downline of this member.