Go to Configuration > Admin > SecGroup Maint from the left hand menu or click on SecGroup Maint under Configuration on the home page.

The purpose of specializing users in to certain groups is to separate them based on various access level, i,e, what they can access and what they cannot. It is recommended to configure the groups before assigning users in the system. Here's the description of the system default groups.
- Full: This is the Admin user type with all the powers i.e. controls everything in the system and must only be assigned to the owners.
- Senior Admin: Similar to Full, but cannot see the pages that are under construction or the pages not in system use currently.
- Junior Admin: This user type does not have access to Reporting, Configuration, Email Engine, OMSYS Admin and Recognition areas.
- Senior Support: Mostly assigned to the admin of the support representative staff. Can look up a member and do FAQ help desk work.
- Junior Support: Can only do FAQ help desk work, without the ability to search for members and work on the details of a members account.
- Senior Translator: Has the ability to translate the system in other languages, and can also approve the translations by himself.
- Junior Translator:' Has the ability to translate the system in other languages, but cannot approve the translations done by him.
- Distributor: The users who signup in the system as a Distributor. Generally they get the products or services in wholesale price.
- Customer: The users who signup in the system as a Customer. Generally they get the products or services in retail price.
- Prospect: They only have the access to view the company's website and register themselves before purchasing any products.
- No Access: This means NO access to the site. This access level is used to temporarily block the user from signing in to his account.
- The above mentioned user groups cannot be removed. You can only enable/disable the pages for each groups to set the access rights.
- The user group Full is the supreme one, holding maximum powers and perhaps all the access rights. This is the key group of the system.
- Be careful when you assign a user to as Full. The user holding such access privileges are liable to exploit the rights, leading to disaster.
- Do Not change any settings for the Full group, unless you are required to. In case of accident, note down the changes for reference.
- The users with Full access can view and manage every other groups and admin users. Changing the settings may loose the access rights.
In the Group Maint interface, you would find the list of the existing user groups, which are made available to your system. In order to add a new group, type in the group name in the text-box provided at the top of the Group Maintenance table and then click on the Add button next to it to proceed.

You will then be redirected to the Admin Group Edit section, where you need to specify the details of the user group you are creating. Enter the values of the attributes as described in the following points and then click on the Update button below to save the changes in the system and proceed.
- Name: The name or a short description of the group. The value auto-populates from the previous step.
- User Type: Select a pre-set user group from the drop-list and that setting will be populated on update.
- Comment: This space is for entering any additional identification information related to the user group.

After you have updated the details, the page will then refresh and save the information. Acknowledge the message displayed at the top of the page.

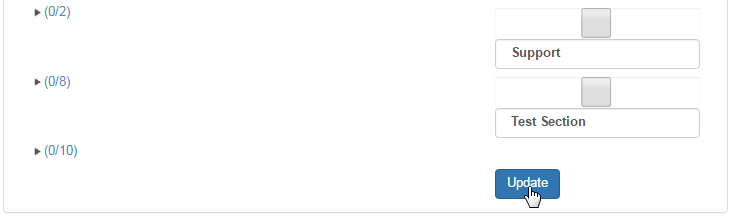
Once you click on the Update button, the page will refresh and save your preferences. Next, you will notice that the list of all the system pages are displayed below the Admin Group Edit. The pages will be categorized based on the sections (maintaining the sorting order) as they are included into.
This where you can set the permission for the user type to which pages of the system they can have access to. If you want the users to have FULL access to a particular section, then simply check on the box on top of the section name. This would enable all the pages within that section.
- For example, the Translation section contains 5 pages and on checking that section will mark all 5 pages vs. selecting them individually.
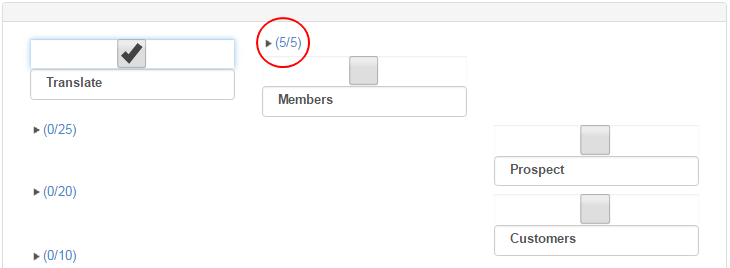
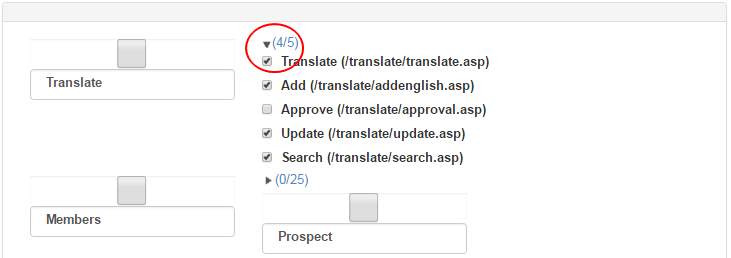
You can customize the groups further by clicking on the arrow to the right of each section to expand the list of the pages contained. Then select each page you want the group to have access to by checking on the box preceding to the page name. Select the pages in other sections in same manner.
- If you want to select individual pages, then un-check the box for full access of the section to enable the check-boxes for each page.
This way you can enable or disable the access rights of the pages/menus/modules of the system for the a user group. Once you have made all your adjustments, scroll down to the bottom of the page and click on the Update button in order to save and apply the changes.
This completes the setting up of an User Group in your system with a certain access rights. To return to the Group Maint area, click on the Back to Group Maintenance link. To go to the update section for any group, click on the Edit button next to that group and do the changes as required.
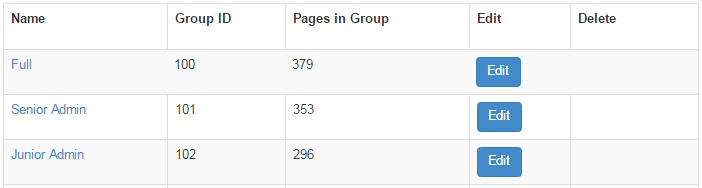
- Name: The name or the short description of the user group. It is better to have meaningful name for easy reference.
- Group ID: The identification number to represent the groups. This also acts as the sorting order of the groups in the list.
- Pages in Group: The number of pages that are currently enabled for the users (belonging to that group) to have access.
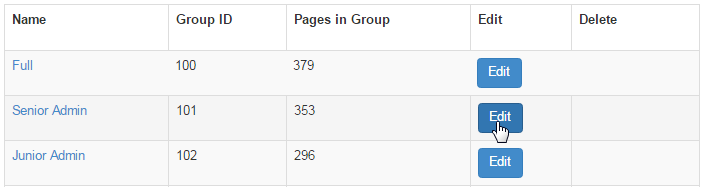
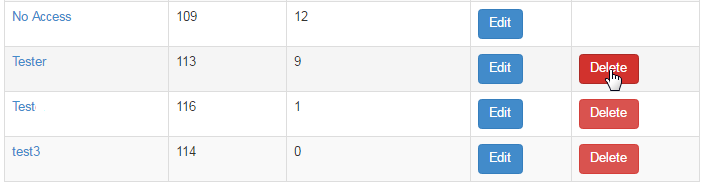
In order to remove a user group, click on the corresponding Delete button (under the column with same label). Remember, only the groups that you have created can be removed vs the system defaults. Be careful before you act, because the process is irreversible. Contact INS Support for any query.