While you are inside the Website Section Editor interface, click on the Add New Section / Update Sections link next to the Website Sections label at the top of the page or click on the button with same title at the bottom of the page. Both redirects to the same area. Lets go with the link at the top.

You will then be redirected to the Section Editor interface. To add a new section, fill in the blank fields in the top row and then click on the Add button.
- SectionID: It is the unique identification number of the section. Check that the number you put has not been used already.
- SkinTy: Enter the value zero (0) in this field, which the default type. It is not required as long you are not a advance user.
- SortOrder: Enter the sorting order or the order of appearance of the section in the tree menu. Value should be numeric.
- Descr: Type in the name or a short description of the section you want to add in the tree menu. It would be displayed as Title.
- AltTag: Enter an alternative tag name for the section. It is an optional field. It may be same as the description of the section.

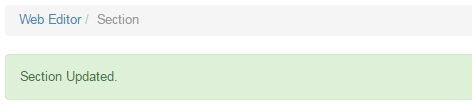
A Section Updated message will be displayed at the top bar. Also find that the new section will be listed below based on the specified sort order.
You can edit the details of the section, i.e. SortOrder, Descr, AltTag, by simply changing the values in the fields and then click on the Update button.

Now the section you have created will not be visible in the tree menu since it is empty, i.e. contains no page. You need to add some pages in order to display the section (menu) in the website. In order to start adding new pages into the section, click on the corresponding Edit button in that row.

Next, enter the details of the page you want to create and then click on the Add button. Read the instruction regarding Sort Order before you act.
- Page Name: Enter a name or short description of the page. This will displayed as the Title of the page in the tree menu.
- Sort Order: Set the sort order or the order of appearance of the page as you like to display the page in the tree menu.
- UserTy: Select a user type or access level for the page, i.e. who can see the page. you can change it later as your prefer.
- Public viewing pages would be Customer and Prospect. Only use customer if you have the special customer only feature turned on.
- It is not standard so unless it was discussed with you, you will not have it. Most pages you will set as Prospect in a standard system.
- If you set it as Distributor, it would only show up to the distributors only. For this to happen, not only would it need to be set as distributor, but you would need to place it in the members section. So, usually unless you have the customer option installed, you will use Prospect.
- Client Custom Page: Be sure to check on this box to add the page a client custom page. It gives you the ability to edit the page content.

This will take you to the Page Editor, where you can design the page and set the values for related attributes as you prefer. We have explained the detailed process of adding and setting up a client custom page in the Add or Update Page tutorial. Here's a brief description for your knowledge.
- The Page Namewill be auto-populated from the previous step. However, you can change it in here if that is your requirement.
- Design the content of the page in the web-editor. Make use of the tools in the toolbar. For HTML content, click on the Source tab.
- Set the Viewing Permissions as per your requirement, i.e. which user types are allowed to view the page and/or hide from whom.
- Enter the Meta details, set an menu Icon and manual Help link to the page. Then click on the Save button in the Publishing section.