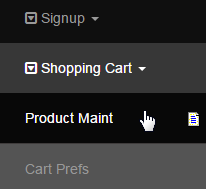
Go to Configuration > Shopping Cart > Product Maint from the left hand menu or click on Product Maint under Configuration on the home page.
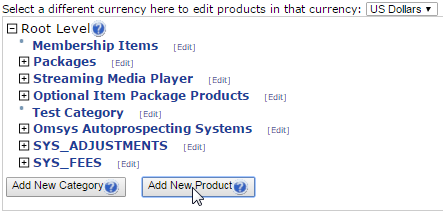
This will take you to the Product Maintenance page where you will find the list of products arranged in a tree structure. First you need to select the Currency Type you wish to add a Product for. This is a critical step as the product will only show up for the currency you have added them to.
- For example, if you add a product for $USD, but the member selects $CAD for products they wish to see, then the $USD products will not show up. Chances are your system is only going to be in one currency type (the default type) initially, so this should not be an issue. Just be careful!

Once you have selected the appropriate currency type, the page will refresh itself. Then click on the Add New Product button below to start.
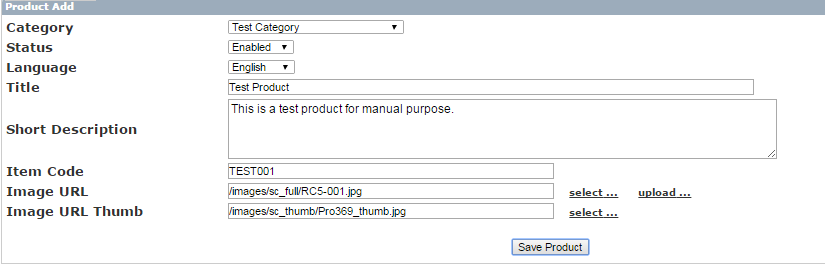
In the Product Add page, you need to specify the attributes and then click on the Save Product button below. Find below a description of the fields:
- Category: Select a position from the drop down menu where you would like this product to appear. If you want this product to be displayed in the top level category, then select Product Order which is the Root Level itself. Or else, select an existing category where you want it to display.
- Status: The status of the product, i.e. Enable (default), Disabled, etc. Open the drop down menu and select your preferred one.
- Deleted: Removes the product completely from the system database. You can never restore this product back.
- Disabled: Removes the product from the Members and Prospects view. It will be visible to Admin with a strike-through.
- Enabled: Displays the product in the shopping cart to all viewers; This is the Default type to make the product visible to all users.
- Read Only: Displays the product to all viewers, but only the Admin with full access permission can edit the product.
- OutofStock: Disables the product from adding to the cart or for purchasing. The information related to the product is still visible.
- Language: Select a language to make the product available for. To add a new language, go to Translation > Enable Language page.
- Title: Type in a name for the product you want to add, in the text-box provided. This title will be displayed in the shopping cart.
- Short Description: Add a brief description that will show up beside the product in the Shopping Cart view. Drag the box to expand.
- You will have the option in Step 2 to put a Full Description into the system. It will show on clicking the More Info link in the Shopping Cart.
- Item Code: A unique identification code for the product. Type in the code in the text-box provided. The code can be alphanumeric.
- Image URL: The image you want shown with the full view of the product. This is where you will select a picture that corresponds to your product.
- select... Use this link to choose any previously uploaded image from the file manager of the system.
- upload... Use this link to upload a new image into the server. Then select it from the file manager.
- Image URL Thumb: An image thumb is a small image of the product used as a display picture which goes alongside the Short Description in the category view. Click on select to choose an existing image; alternatively, click upload (beside the Image URL) to upload a new image.
Note:
- The thumbnail that is generated from the image you upload will automatically be trimmed if greater than the radio option dimensions shown when you click on upload (120, 200 or 250 pixels square); so please try to keep image dimensions within these limits. For best results, try to keep the images square.
- It is good practice to restrict filenames to using alphanumeric characters only. If a filename contains special characters (eg: %, &, $) this could cause the upload to function incorrectly or fail.
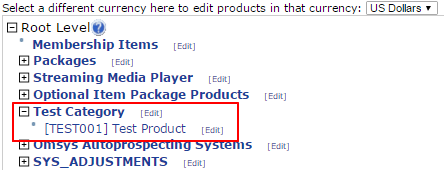
If the process went well, you will see a Success message. Click OK to acknowledge the action. You will be automatically redirected to the Product Maintenance page. The product you have just added has not been configured yet. Check the next tutorial on how to edit the product properties.
- Be careful while Deleting a product/item from the shopping cart. While deleting a product make sure you also delete all the items under it.
- No two products or items should bear similar name, description or item codes. This can cause interference between different products/items.
- DO NOT create duplicate copy of a product or an item. Instead edit the original one. If required so, then first Disabled the original product.
- In case of the deleting and re-creating a product or an item, ensure that the information is passed to all your staffs (aware of the changes).