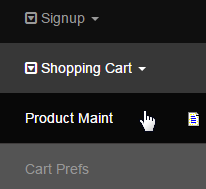
If you have lots of products, it is important to take a moment and think about how you want to organize them. It is best to take a look at all your products and then map out all the categories that you wish to enter. Go to Configuration > Shopping Cart > Product Maint from the left hand menu.
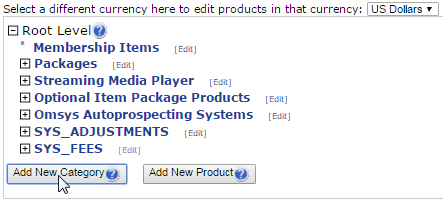
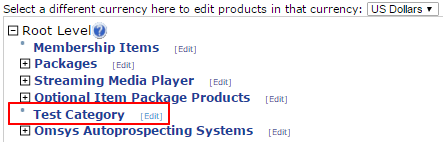
This will take you to the Product Maintenance page where you will find the list of products arranged in a tree structure. First you need to select the Currency Type you wish to add a Category for. This is a critical step as the categories will only show up for the currency you have added them to.
- For example, if you add a category for $USD, but the member selects $CAD for products they wish to see, then the $USD category will not show up. Chances are your system is only going to be in one currency type (the default type) initially, so this should not be an issue. Just be careful!

Once you have selected the appropriate currency type, the page will refresh itself. Then click on the Add New Category button below to start.
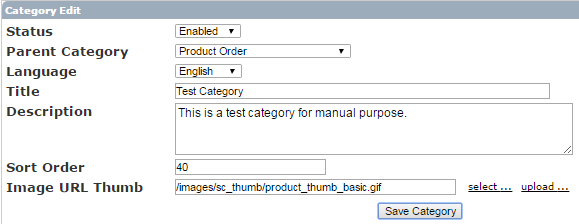
In the Category Edit page, you need to specify the attributes and then click on the Save Category button below. Find below a description of the fields:
- Status: The status of the category, i.e. Enable (default), Disabled, etc. Open the drop down menu and select your preferred one.
- Deleted: Removes the category and the products under it completely from the system database; Can never be restored.
- Disabled: Removes the category from the Members and Prospects view. It will be visible to Admin with a strike-through.
- Enabled: Displays the category in the shopping cart to all viewers. This is the default status to make the category visible.
- Read Only: Displays the category to all viewers, but only the Admin with full access permission can edit the category.
- Parent Category: Select a position from the drop down menu where you would like this category to appear. If you want this to be a top level category, then select the Product Order option which is the Root Level itself. To make it a sub-category, select an existing category.
- Language: Select a language to make the category available for. To add a new language, go to the Translation > Enable Language page.
- Title: Type in a name for the category you want to add, in the text-box provided. This title will be displayed in the product list.
- Description: Add a description to explain the purpose or content of the category for easy reference. Drag the box to expand.
- Sort Order: The order of appearance in the list. The lowest visible precedence is 1; A Category with a sort order of 0 (zero) is hidden from view.
- Image URL Thumb: In case you want to have an image associated with this category, choose it here. The URL will appear in the display box.
- select... Use this link to choose any previously uploaded image from the file manager of the system.
- upload... Use this link to upload a new image into the server. Then select it from the file manager.
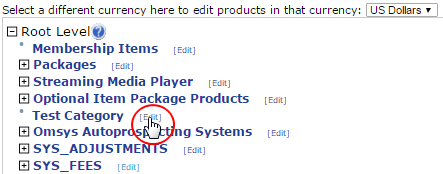
The system will acknowledge your action with a Category Updated Successfully message. Go back to the Product Order page and check that the new category you have added gets listed in your preferred order. Now click on the [Edit] link next to the category name to set the access rights for viewers.
In the Category Edit page you will notice a new section at the bottom called Category Access. Tick on the check-box for the users/areas you want the category to be displayed in and then click on the Save button to commit to these changes. If you have the special customer website add-on, you can check that as well.

You should receive a confirmation message from the system to acknowledge your action. Go back to the Product Order page; Notice a blue dot preceding the category name. This shows that the category you have just configured is empty. Check the next tutorial on how to add a product.
You can decide if you want to add all your categories first, or add a category and then the products. It is totally up to you.
Drag & Drop: In this system, you are able to drag and drop categories and products from one position to another. In the future it will be very simple on your part to change a category into a sub-category of another category, or just to move a product from one category to another. Here's the steps:
- Simply hold down your mouse button on a product or category, then drag it a short way before releasing the mouse button.
- Once you have done this, you will see that the product or the category you dragged gets stuck to your mouse pointer.
- You can position the product or category over the new place you wish it to live, then click your mouse button to insert it.
- This will insert or drop the product or the category to the new location. Then click on the Save Moves button to commit.
Signup checkbox: The Signup checkbox is for items you wish to be displayed in the special Image View style (also known as Showcase view). When new members sign up, they will be presented with a "showcase" view containing all items with 'Signup' ticked before progressing to the normal shopping cart screen. Please be aware that this is a special view which differs from the normal shopping cart. Contact INS Support for any query.