Click on Viewers on the left hand side to expand the menu structure and then click on the Placement Viewer sub-menu.
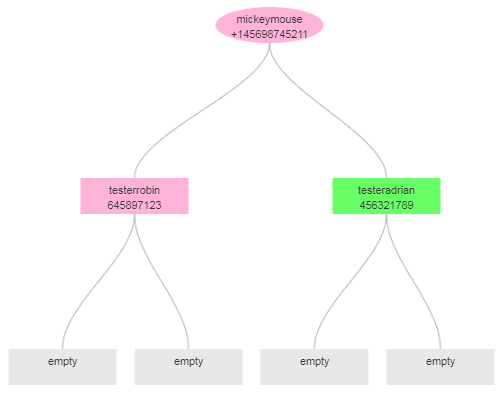
You will be redirected to a new browser tab, where the interface detailing the downline tree of the member will be presented in a graphical format. The members can see how and where his downlines are placed below him, the start being the member himself. Note that the customers are not shown.
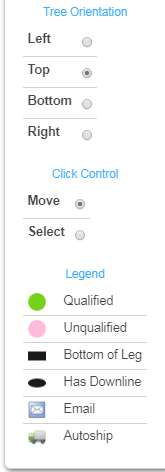
The meaning of the entities in the graph and other icons are stated on the right hand side of the page as Legend. In this section, you can also set your preference on Tree Orientation (start node direction) and Click Control (event on left-mouse button) by clicking on the radio-button of your choice.
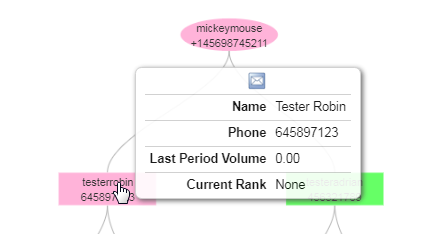
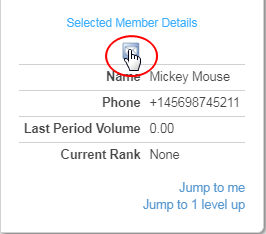
On the left hand side, the menu-section lists the details of the selected member. You can also find the details of a member in the tree by hovering the mouse over the legend/entity which displays the username of the member. It is the admin who decides or controls what information to be shown here.
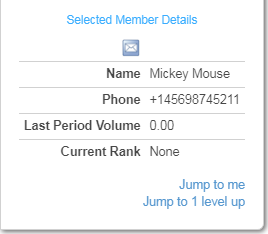
At the bottom, type in the username of the member in the downline and then click on the Jump to Username button next to it, to see the placement viewer of that member. To get back to the placement viewer of the current member, simply click on the Jump to me link in the left hand section.

In addition to that, you can zoom in or out the graphical representation to suit your desire. Hovering the mouse over the entities (legend) displays the details of that downline member as well. Clicking on the Email icon (generally located on the right hand menu) would take you to the Member Mails page.
The members like to spend time in this viewer. Among the bottom navigation switches, the Toggle Menus button displays or hides the left and right sections (menus) for bigger views. Also, what you see on the screen (not the entire downline) can be printed via clicking on the Print this page button.