Go to Distributor and then search for the distributor/member using his username, name, etc. Click here to learn more about Distributor Search options.
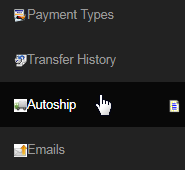
You will then be redirected to the Distributor Maintenance area of that member. Click on the Autoship option from the left hand menu to go to that page.
This is NOT where you process autoships. Here you can manage the autoship for a member. Trying to process autoships for a live company, one at a time, by using this interface will lead to IMMENSE future grief. The proper way is to go to System > Autoship for the daily listings to process those due. However, you can visit the Admin Autoship page of a member by clicking on the Username or the Items link in the Process Autoship.
- The "Rotating Autoships" function is for cases where your items are too expensive as a set to expect a member to purchase them each month, AND possibly too much in a single bottle to run out in a month. To learn more about Rotating Autoship Function, check the manual.
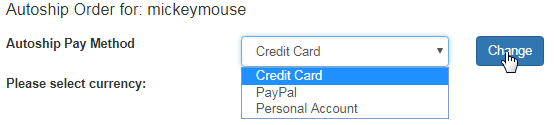
In this section, you can skip, cancel or process the autoship immediately or simply update the details of the autoship. The Autoship Order for field displays the username of the member in question. Below that are the fields to change the payment types and the currency types as follows;
- Autoship Pay Method: This is where you can select a different payment type for autoship. Click on the drop-down list and select the option you prefer. Once done, click on the Change button next to that, followed by confirming the same in the message box by clicking on the Yes button.
- If you select to pay from the Personal Account and there are insufficient funds, then the autoship will come from the Credit Card on file.
- If you select to pay by using the Credit Card on file and if there are insufficient funds, then the autoship will come from the Personal Account.
- You can change the above configuration in the Configuration > Money > Autoship Setup page (at the bottom of the Autoship section).
- Once you have confirmed your action, the system will display an acknowledgement message at the top of the page in a green stripe (may vary).

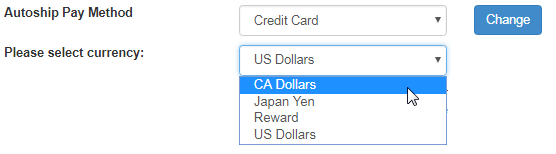
- Please select currency: Here you can select a different currency which will load the autoship product list for that type. Selecting a different currency type will trigger the system to cancel the current autoship order(s). A message box will appear where you need to confirm your action.
Next comes the Summary of Autoship order. The first part provides brief details of the products, quantities and the sub total of the order as follows;
- ItemCode: It is the unique identification code of the item. | Descr: The name or a short description of the product item.
- Qty: The number of product items that has been ordered. This field is editable, i.e. you can change the quantity of the items.
- Points Each: The points associated with each item. | Points Total: Total points associated with the entire autoship order.
- Price Each: The price of each item in the order list. | Price Total: The sum of all the items or the products in the order list.

You can change the quantity of the product items, by simply editing the value in the respective Qty field and then by clicking on the Update button below.

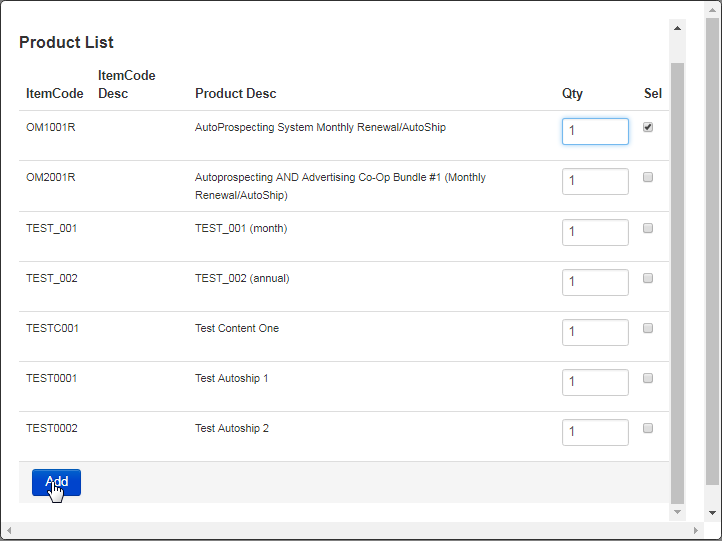
You can also add more products to this order. To do that, start by clicking on the Add another product link just below the order list to bring up the Product List. To select an item, set the Qty and tick on the Sel check-box. Once you have completed your selection, click on the Add button below.
Next is the Fees Area, where all fees can be set. Select the appropriate radio button preceding the fee you are modifying. The values of the fees (shipping, insurance, autoship restart, etc) can be edited. If you change the values, click on the Update button below to save and apply the changes.
- Default: This is selected by default. It means that the default settings are to be used for this member's autoship order.
- Once: It means that the specified fees are to be used one time only and then reverted back to the default fees.
- Permanent: If selected, the user will have a permanent different fee other than the system default fee.
- Restart AshipFee: You can set a penalty charge for going off the autoship here, and charge them for going back on autoship.
- Shipping Fee | Insurance | E-Collect Fee: You can override any of the respective formulas/fees that are used in the system.
- Tax: This is the tax charged for the order. This is a non-editable field. You need to change it in the Tax Tables interface.
- Profit Center: If you are a multi-centered company, you can set which Profit Center to use (the text-box would then be editable).
- System Auto Volume Allocation: You can enable the auto volume allocation feature by ticking on the check-box preceding that.

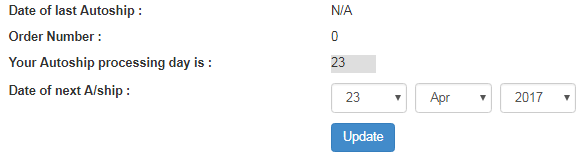
Below the order summary is the autoship date section, which displays the day related to the processing of the autoship. You can modify the date of next autoship, by selecting a different date by using the date engine, and then saving the changes by clicking on the Update button below that field.
- Date of last Autoship: The date on which the last autoship was processed for this member, if applicable.
- Order Number: The order/invoice number of the last processed autoship for this member, if applicable.
- Your Autoship processing day is: The day of the month on which the autoship is scheduled to process for this member. It can be changed forward, but the system will not allow it to be changed backwards, or it would essentially skip them a month which would be an unexpected result.
- Date of next A/ship: The day on which the next autoship will be listed for processing. You can update the date.
The four buttons below the date section can help you save your time and effort. With a single click you can manage the autoship based on requirement;
- Skip Next Autoship: Clicking on this button would allow the admin to skip 1 (one) period autoship (in the case of the member asking for a one month skip). It will automatically set the date 1 (one) month forward and the autoship will be picked up again in the system for the following period.
- Cancel Autoship: This button cancels the current autoship. Make sure you are aware of your action and you have confirmed from the member.
- Process Autoship Now: Clicking on this button would allow the admin to process an immediate autoship for someone. Often after someone asks you to skip, if they find a good member to join, they will want to get an autoship in immediately, so they do not lose out on commissions.
- Update: You need to click on this button to save and apply the changes, if you have edited any values in the order summary or fee section.

Next there is the Autoship Shipping Address section. Here you can add or change autoship shipping addresses. Here's how you can modify the address;
- To swap between existing addresses or to choose a different address, simply click on the respective radio button preceding to that address.
- Click on the Go to Address Maintenance link below and then create a new address or manage the existing ones. Click here to learn more.

- To change a shipping address, do not edit the current one. Instead, add a new one and then switch it with the address in the system that you do not want to use at this moment for shipping purpose. This will ensure if they switch back, you do not have to re-enter all the information.
- The System stores this information, so it can be exported appropriately in a CSV to send to an outsourcer, or printed onto your shipping company's paperwork to make sure it goes out appropriately. The system can handle unlimited shipping addresses and other addresses.
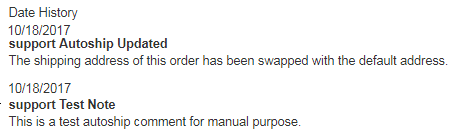
Finally the Admin Autoship page ends with the Distributor History. This is where you can add and save a comment or note regarding the member's autoship for future reference. Type in a Heading and then the Comment in the respective text-area and then click on the Add New button below.
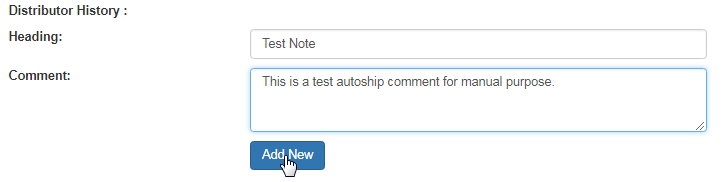
The note you have added will show up as a log at the end of the page. All notes you put into this section will also show up in the main notes section marked as an autoship note. This facilitates the admin area to keep all of the information in a central location for ease of customer service.