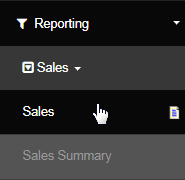
Go to Reporting > Sales > Sales from the left hand menu or click on the Sales link under the Reporting section on the home page.

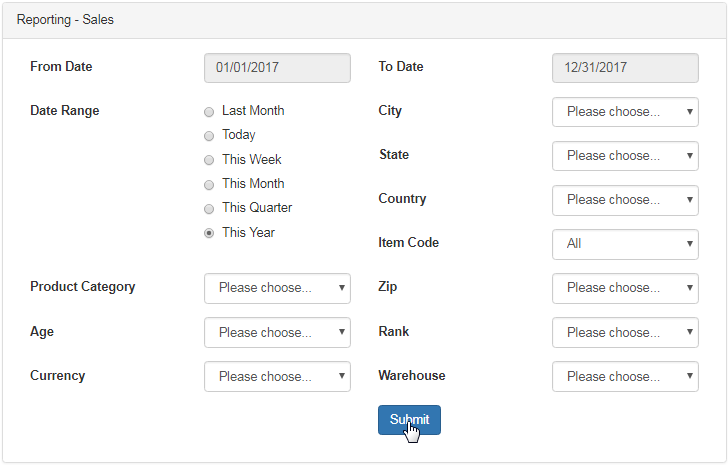
The Reporting Sales Summary page will open up in a new tab. This page contains a bunch of filters that would help you to retrieve the relevant information. This is where the system provides the complete sales details for the specified criteria. Set the options and then click on the Submit button.
- From Date | To Date: Specify a time period, i.e. start and end date of the period for which you want to generate the report for.
- Date Range: Specify a time period by day, week, month, year, etc. The dates will be reflected in the From Date and To Date respectively.
- Country: This lets you search the sales report for a certain country. Only the countries from where the orders are placed will be displayed.
- State: This lets you search the sales report for a geographical state. Only the states from where the orders are placed will be displayed.
- City This lets you search the sales report for a certain city. Only the city names from where the orders are placed will be displayed.
- Zip: This lets you search the sales report for a certain ZIP. Only the postal codes from where the orders are placed will be displayed.
- Product Category: This lets you search the sales report of the products falling under a certain category (as displayed in the cart).
- Item Code: If you remember the item code, then you can search the sales report for a particular product or item that your company sells.
- Age: Filter your search result by the members age group. | Rank: Filter your search result by a certain rank obtained by the members.
- Currency | Warehouse: Filter your search result by a currency type or a warehouse respectively. Only enabled options will be displayed.

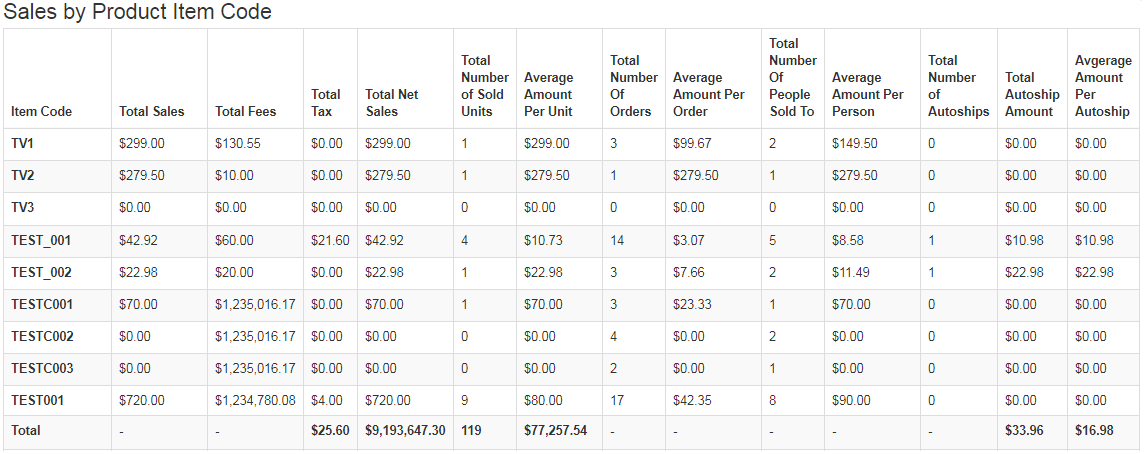
Try it yourself: Lets say that you want to check the total amount of each product sold for the current year. Select the Date Range as This Year and Item Code as All and hit Submit (do not change the values for the other fields). A report will be generated to display the individual products and the total amount sold.

In this way, you can find the report for each filter by specifying a respective value (drop-list). The Sales by filter table will be displayed below the search engine. In short, the filters for which you have specified a value for, will seek out separate reports for the same. Here are some reports for your reference;


- It is not recommended to delete a member and is generally not an acceptable practice. Deleting a member wipes out all his records from the system, and this process is irreversible. It is only available to you as a courtesy for data entry errors and should only be used for your initial setup.
- Instead of deleting a member from the system, use the Terminate function. By Terminating, you can completely lock that member out of the system. And at the same time, you can maintain the history, which includes support, orders, personal balances, and all other nugget information.
- Caution !!!: DO NOT use the delete function for a live account, if there have been any transactions at all. Member Deletion will affect the reports.
