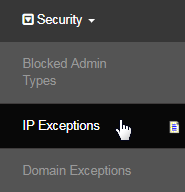
Go to Configuration > Security > IP Exceptions from the left hand menu or click on IP Exceptions under Configuration on the home page.

In the previous manual page, you learned how to Block Admin Types, where you can prevent the access for certain admin types. This area controls which Admin accounts are allowed to access the site, i.e. which IP address (geographic locations) they can connect from. Here's how it works;
- Lets say that you have prevented a certain admin type from getting access to your website under the Blocked Admin Types section.
- Individual IP address exceptions are then set up under IP Exceptions, which will circumvent the global block for the Admin type.
- These IP Exceptions should refer to specific places that Admin types will work from: for example, a personal computer at home or the office.
- Caution: YOU CAN LOCK YOURSELF OUT OF THE SYSTEM WITH THESE SETTINGS.. If you are modifying the IP restrictions for admin groups which YOU BELONG TO, be sure to set the IP Exception for your own IP address before blocking your own Admin type.
- The settings here do not control which admin accounts are active on the site. It simply controls where the admin accounts can be used from.
- IP identifiers refer to a specific internet network location, which is usually tied to a physical geographic location, and normally remains static.
- If the IP restrictions act erratically, check whether the target has a dynamic IP allocation from their Internet Service Provider (ISP).
- Static IP allocation is required for this to work reliably. If any IP Exceptions do not work, they might use dynamic IP's (check with ISP).
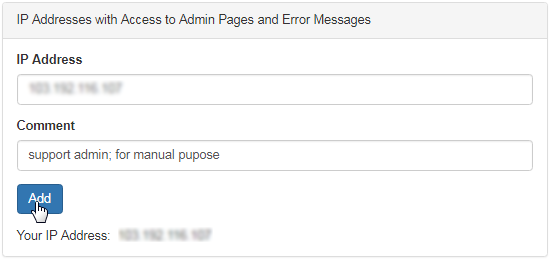
This step allows an IP exception through the global lockout (this is adding a door through the wall step). Once you have entered the details of the IP address and are happy with it, click on the Add button to save and apply the changes. Below are the descriptions of the fields required to be filled in;
- IP Address: Enter the IP address (in the given space) that you want to give access permission to your website. Check the description below;
- IP Addresses are represented as 3-digits in 4-sets, that identifies each computer, separated by periods. For example: 123.123.123.123
- A set may have less than 3-digits in some cases. You might see IP addresses less than 12 digits total, for example: 12.123.123.12
- Comment: Enter a short description for where this IP address is located for your reference; for example, Tokyo Hotel, Victoria Street Office, etc.
- Your IP Address: Here you should see the IP address which you are currently connected from. This is given for your easy reference.
- If this is blank or you are unsure, you can try going to www.whatismyip.com (displayed at the top); or check with your network technician.

You should see the new IP entry listed in a row below the entry fields. You can edit the IP details or can remove as and when required as follows;
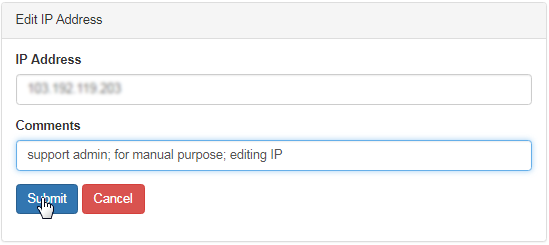
- In order to update the details of any IP exception, simply click on the corresponding Edit button to take you to the Edit IP Address interface.

- Now the fields will be made editable, where you can change the details and click on the Submit button. To abort the edits, click Cancel.

- Note: If you enter an existing IP, i.e. already added to exception list, then an Entry already exists message (strip) will be displayed at the top.
- In order to remove an exception from the list, simply click on the corresponding Delete button and confirm your action in the pop-up dialog box that says, Delete IP Address?. Click on the OK button to proceed. Once done, a strip with the Record deleted message will be displayed at the top.

