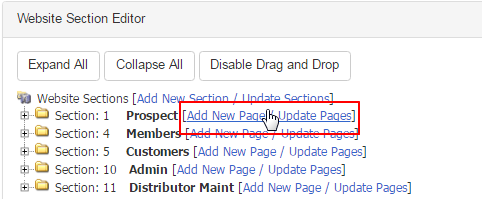
While you are inside the Website Section Editor interface, click on the Add New Page / Update Pages link next to the section name under which you want to create the new page. This determines that the page will appear to that specific user type. Let us add a page that would be displayed to the prospects.
- You can also place it under a sub-section which determines the menu. Expand the section and click on the Add New Page link next to that.
This will take you to the part of the Website Section Editor where you can create a new page or manage the existing ones. In order to create a new page, fill in the details, put a check in the Client Custom Page box and then click on the Add New button. Here's a description of the fields you need to fill in;
- Page Name: The name of the page as it will be displayed in the website section editor. This is what the link will ultimately be called in the menu.
- Sort Order: The Sort Order is where you decide where it will show in the list of other menu items. The input must be a numeric value.
- UserTy: The user access level for this page, i.e. the user group meant to view the page. The Public viewing pages would be for the customer and prospect.
- Client Custom Page: The option to create a custom page which lets you design your own content. Make sure that you have checked this box.

- In order to hide a page from the user view, set the Sort Order of that page to 0 (zero). The page can still be viewed through direct linking.
- Only use UserTy as Customer, if you have the special customer only feature turned on in the system. It is not a standard type and hence, unless it was discussed with you earlier, you will not have that option. Most pages would be set as Prospect in a standard system.
- If you set the UserTy as Distributor, it would only show up if you are logged in as a distributor. For this to happen, not only would it need to be set as distributor, but you would need to place it in the members section. The permissions you set are inherited from the lower users.
- For e.g., if you set a specific page to be available to a Junior Translator, then the users with higher access can also see those pages.
Next, the newly created page will open up in the Page Editor. You can change the name of the page in the Page Name text box which populates from the previous step. Start to design the content of the page in the web-editor. Make use of the macros and the tools in the toolbar to define the content.
- Refer to the Macro List manual for a complete list of system available macros and the Webeditor Toolbar manual to learn more about the tools.
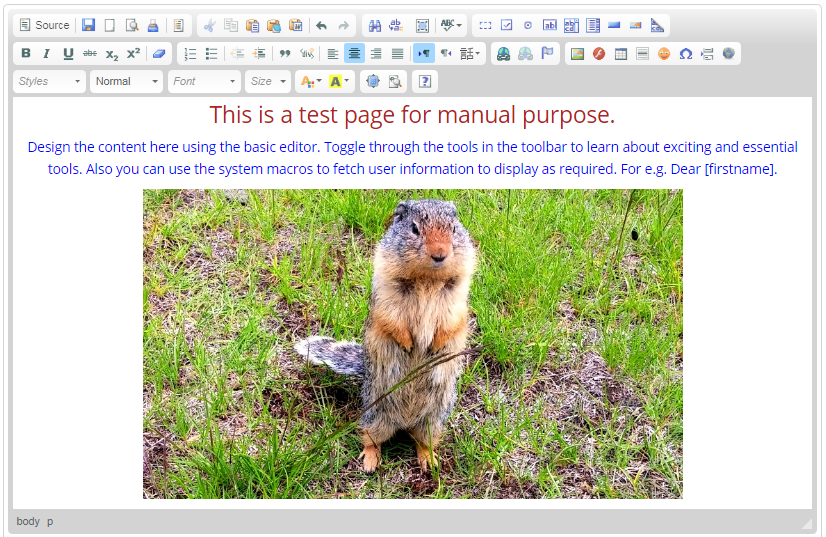
If you have the content of a page created in another HTML editor, you can simply click on the Source tab in the toolbar and then paste the code in.

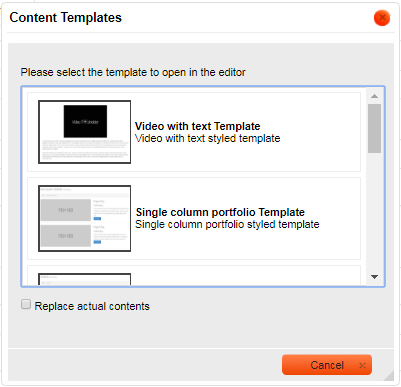
The system also provides some pre-defined templates. Click on the Insert Template button at the bottom of the web-editor to open the template list.

Now, in the Content Templates window, click on any template to open it in the editor. You will be able to design the content as preferred. The Replace actual contents check box, if ticked, replaces the original content. Make sure you have saved the current content in a note pad before using this feature.
After the editing is done and the content is ready, you need to take care of some more details as follows. Enter the values as per your requirements;
- Viewing Permissions: This function controls which user group can view this page. You can show/hide this page only to a specific flag or even to specific User Groups. Basically, you can manage the access level of this custom page among various user groups. You can perform the following;
- Groups: Select from the drop-down list, the user groups whom you want to make the page available for. Check on the options to select.
- Hide from Flag: Select the flag type of the user group for whom you want to prevent the display of this page. This is an optional feature.
- Display to Flag: Select the flag type of the user group only for whom you want to allow the display of this page. This is an optional feature.

- MetaTitle: It is the title of your page that will show up in the browser top blue bar, and is important for search engine placements.
- Comment: The Comment field determines the text which appears upon hovering the mouse over the browser tab.
- MetaDescr: It is a short description of what the page is about and what it contains. It provides a short summary of the page during the search.
- MetaKeyWords: The words that are important to convey the key point, and are used multiple times in the page. Enter them separated by commas.

- Icon Image URL: The link to the icon image file (that would appear next to the menu item). To learn more about this function, click here.
- Analytics Code: You can add the website statistic analytics codes here (if required). To learn more about this function, click here.
- Help URL: The URL or the link to the manual guide of this page. To learn more about this function, click here.

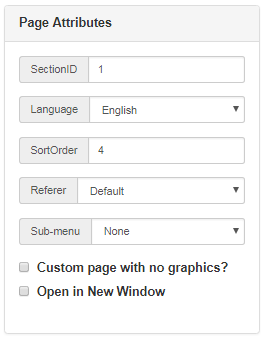
- Page Attributes:
- SectionID: This is the identification number of the Section under which the page has been placed, i.e. Prospect, Manual, Admin, etc. Changing the SectionID will move the page to that specific section. Check the SectionID of a section in the Menu/Web Editor main page.
- Language: If you want to edit in any other language other than English, then select it before you start creating the content. It is important to do this right, so the appropriate encoding set will be used. Be sure you only use languages we have set the system up for you to use.
- SortOrder: Change the order of the placement of the page as you deem fit. This will change the position of the menu item on the website.
- Referer: Select a different referrer from the drop-down list, if you wish to make the page available for the same. Standard is Default.
- Sub-menu: Select the sub-section or sub-menu under which you want to place the page. Select None if it is not required.
- Custom page with no graphics: Ticking on this box will prevent any graphical content to be available in the display of the page.
- Open in New Window: Ticking on this box will allow the page to open in a new tab, when the user clicks on the page or menu link.
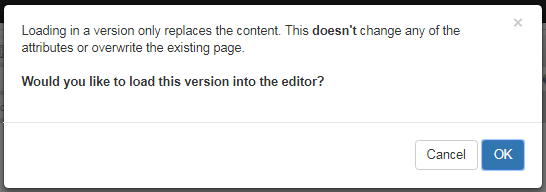
- Page Versions: The system keeps a record of the previous edits of the page. If required you can revert back to an older version. In that case, select a version from the drop-down menu and then click on the Preview Version button. Then confirm to load the version by clicking on OK.
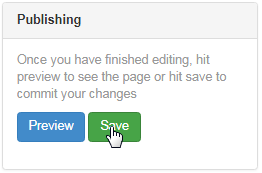
- Publishing: This section contains the options to Preview and/or Save the page after editing. Before saving the page, you can see a Preview of the edited content. Remember to click on the Save button after every edit and before exiting the Page Editor interface to commit to the changes.
Once you have saved the content, the page will refresh itself and provide you with the Permalink below the Page Name. It is the URL of the current page, which you can use to link to other pages in your website. Click on the Copy Permalink button to copy the entire URL to your clipboard.
- You can also edit the URL if required by clicking on the Edit Permalink button. This will open a dialog box where you can type in the new URL of the page and then click on the OK button to save. Be careful while updating a link, since it may cause troubles if not done properly or if it is broken.

The page you have just created will be listed in the tree structure on the Website Section Editor main page. In order to edit the page, expand the the section under which it resides and then click on the Edit link next to that page. It will open up in a Page Editor where you can carry on with your updates.
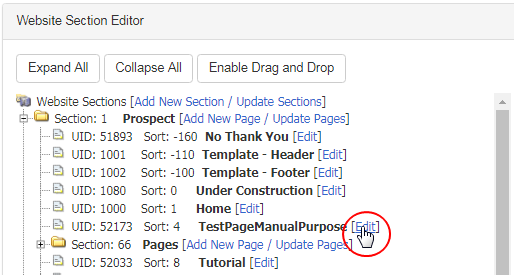
Alternatively, you can click on the Add New Page / Update Page link next to the respective section, under which you will find the page you want to edit.
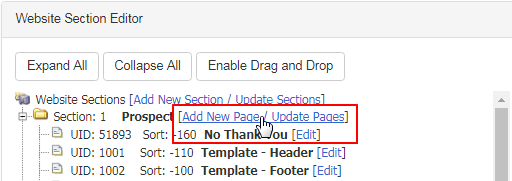
This will bring up the Section Editor where you will see the option to create another page, and the list of existing pages in the respective section. Scroll down to the Modify Pages list and search for the page you wish to edit. Then simply click on the corresponding Edit button to go to the Page Editor.

In order to delete a custom page, simply click on the Delete button corresponding to that row, followed by confirming your action in the dialog box. Please be careful while deleting a page - the process is irreversible. Do not delete the essential pages - it could affect the system from performing flawlessly.

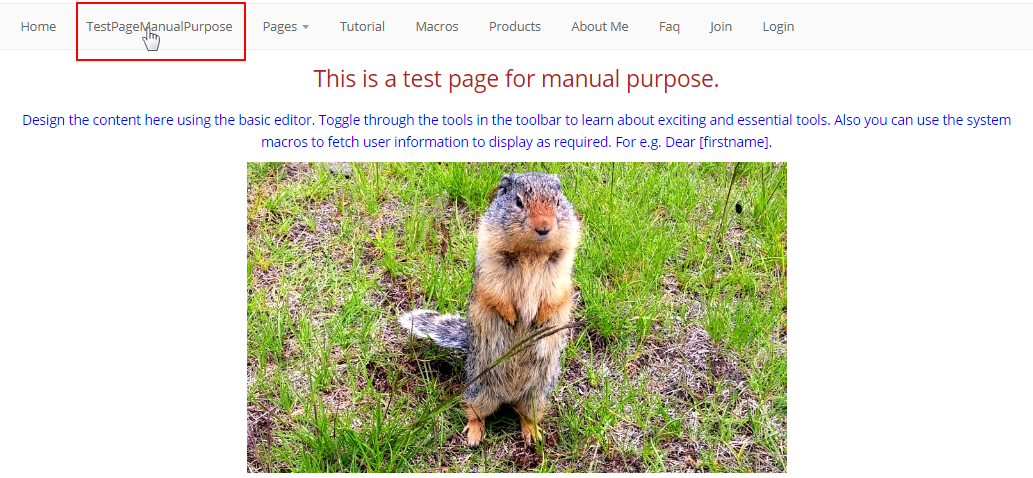
Now as the new page is built, you would probably like to have a look at the same. In our example, we have added the page TestPageManualPurpose in the Prospect section (made public) and hence it should be displayed as a menu item in the top navigation bar on the website. Lets check it out.
