This tutorial will walk you through creating a questionnaire page for your members and collecting data from them.
The first step is you need to create the page that will hold your questionnaire. If you are unfamiliar on how to create a page, it is best you follow our Web Editor Tutorials. You can start here Webeditor Backup
If you are comfortable with creating pages, then we can proceed with the tutorial.
Note: Server Side scripts aren't supported. Javascript however is supported in the form
Note: Please do not include the opening and closing form tags for example: <form></form>, this will only break your page.
The first step to creating a questionnaire page is to tick the box where it says [Questionnaire page](see fig.1)
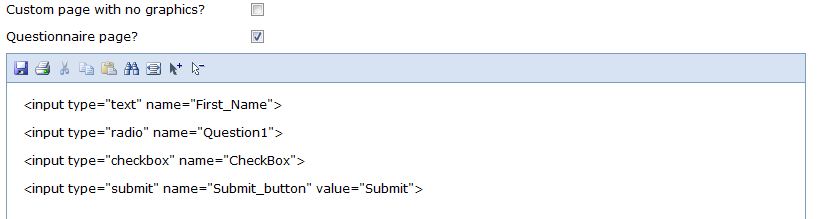
(fig.1)
Now you must add the form tags in to the page for the information you would like to collect. Firstly you must choose the [Html] tag to input any HTML form tag ((see fig.2).
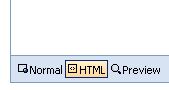
(fig.2)
You can use any form tags in the form, for example; radio buttons, check box, text box, text area.
You can also add javascript in the page for form validation.
When adding in the names of the forms, you must ensure that they DO NOT contain any spaces or special characters in the name. Dashes((-) or Underscores((_) are accepted.
Referring to fig.1 you can see a few examples.
Once you have put all the form tags in that you require, save the page as per normal.
Now when a member fills the form out, the data will be submitted to the database for you to view.
You can see the submitted details by going to System -> Questionnaire (see fig.3)
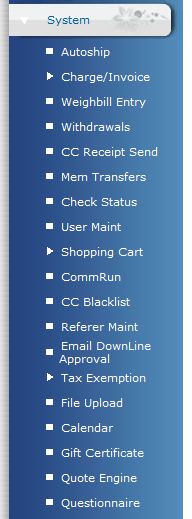
(fig.3)
Then you can choose the date range and choose the questionnaire from the drop down box. Hit submit to view the entries. (see fig.4)

(fig.4)
The list of entires will be displayed, you can then view the entry in more detail by clicking on the edit button. (see fig.5)

(fig.5)
The information is displayed exactly as the form is displayed for members. You can then edit any detail you like if you wish.