Please note that in different versions of Outlook Express the menu items that allow you to locate that which I am referring to differs. i.e. - the name of the menu item changes, they are not generic. This tutorial is based off Version 6 of Outlook Express. The screenshots may differ based on the version.
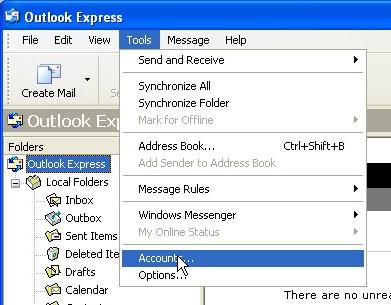
Step 1: This is a simple process. First you need to open Outlook Express application and then click on Tools > Accounts from the top menu bar.
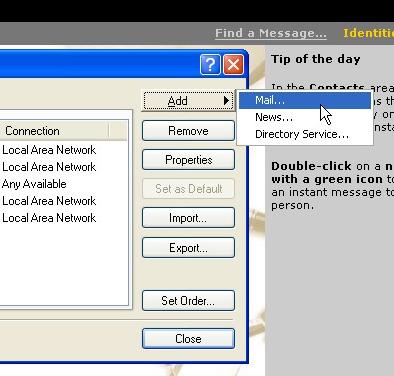
Step 2: Now in the Account window, click on the Add button in the right side of the window and then click on the Mail option.
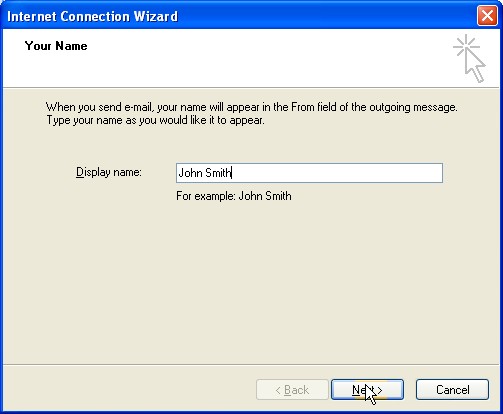
Step 3: First enter your Display Name as requested. This is the name that will appear when you send emails to people. Click on the Next button.
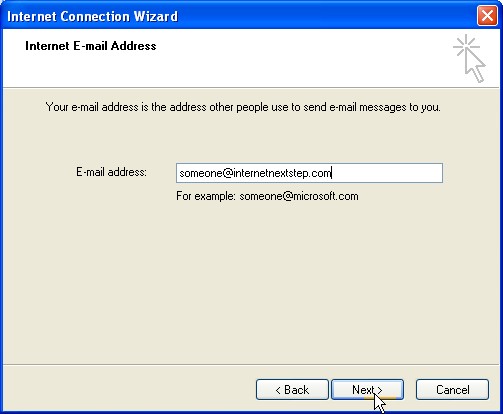
Step 4: Enter your Email Addressin the text-box provided, e.g. - someone@internetnextstep.com. Click on the Next button to proceed.
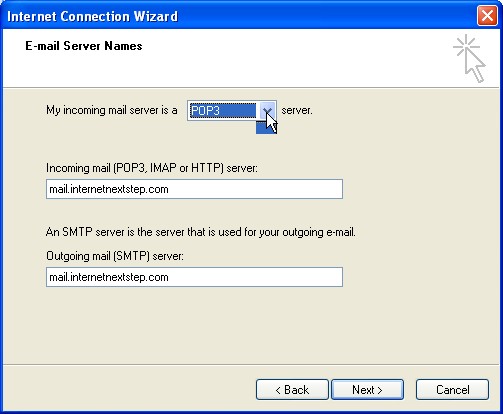
Step 5: You can either choose either POP3 or IMAP from the drop-list for your Incoming Mail Server. Please note that once you set this (saved the preference), it cannot be changed and have to redo entire setup if type in incorrect settings and finish setup. Click on the Next button once done.
- POP3 means that all emails will mean that once the email(s) have been downloaded from the server, the server copy will be erased.
- There can only ever be one copy of email. For example if setup someone@internetnextstep.com on two computers and download them from computer1 you cannot go to computer2 and re-download them.
- However with IMAP you can. Download on to both computers and when you are ready - purge all (this is a delete command - so cannot download again to either computer). You do this by clicking on the messages you want to delete then select Delete from the toolbar.
- Go to Edit > Purge Deleted Messages. Note that once this is done messages cannot be recovered.
Anyway, next step is to set the Incoming Mail Server and the Outgoing Mail Server, they are the same - "mail.yourdomain".
- For example, if I am someone@internetnextstep.com, I would type in mail.internetnextstep.com for the Incoming and Outgoing Mail Server.
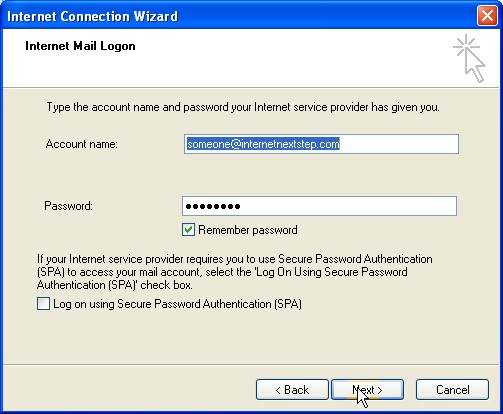
Step 6: Next type in your Account Name, this can be either someone@internetnextstep.com or just simple your username (someone).
- However, it seems to always work better if type in someone@internetnextstep.com. Then, set your Password and remember to tick the box Remember Password or you will have to enter your password every time you send and receive. Click on Next & then Finish button.
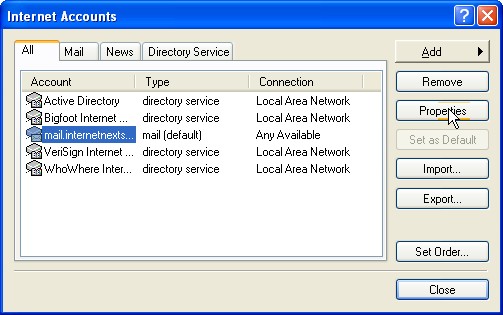
Step 7: When using the mail.yourdomain as the outgoing server you have to authenticate against the server. To do this select the account you want by simply clicking on it under the Account column, then click on the Properties button and click on the Servers tab.
Step 8: Then scroll down to the base of the page under Outgoing Mail Server tick the box that says My server requires authentication.

Step 9: Once you have done this click on the Apply button and then click on OK. Once done, close the application. Now you will be able to send and receive emails. If cannot connect, double check your settings; if this fails please contact INS Support (via skype or bug) and we will look into it.